How to Add a New Variation to Existing WooCommerce Products
Add a new size to one WooCommerce product or eighty: the exact steps, the CSV columns, and why Generate variations won't delete what you have.
Updated

In this article17 sections
Your supplier has started doing XXL. You now need it on eighty existing products, each of which already has variations, stock, SKUs and a sales history.
Adding a variation to products you already have is a different job from building the product from scratch, and considerably riskier. This covers the manual route, the bulk route, and the specific ways this goes wrong on live products — because the failure mode here isn’t a bad product you can delete, it’s eighty products that quietly stop working.
The short version, on one product#
- Add the value to the global attribute: Products → Attributes → Size → Configure terms.
- Open the product, tick the new value on the Attributes tab, save attributes.
- On the Variations tab, press Generate variations. It adds the combinations that are missing and leaves the ones you already have — prices, SKUs and stock included — exactly as they were.
- Fill in price, stock and SKU on the new rows.
- Save.
- Open the product on the front end and try to buy the new size.
That is the whole job on one product. The rest of this page is about doing it on eighty without breaking them.
Why this is harder than creating a product#
Building a new product is additive and reversible. If you get it wrong, you delete it and start again.
Editing existing products is neither. Orders reference existing variations. SKUs are on printed labels. Stock quantities correspond to things on a shelf. And a partially-applied change — forty products updated, forty not — leaves you in a state that’s harder to reason about than either end.
So the order of operations matters more than the tool you pick.
Step 1: add the value to the attribute itself#
Before any product can use XXL, the attribute has to know it exists.
If you’re using global attributes — and this is one of the situations where you’ll be glad you did — go to Products → Attributes, find Size, click Configure terms, and add XXL. It’s now available to every product on the site.
If you used custom, product-level attributes, there is no central place. You’ll be retyping the value on every product, with the spelling drift that implies, and no bulk tool can help you because there’s nothing shared to extend. This is the moment the global-versus-custom decision gets expensive.
Either way, this step is the safe one, and it’s worth saying so plainly given what the rest of this page is about. Adding the term changes no product and touches no order — nothing on the site behaves differently until step 2 ticks it on a product, and a term nobody has ticked can be removed again the same way it was added. It is the one part of this job you can run without taking a backup first. (From the shell, attribute taxonomies are named pa_<slug>, so it’s wp term create pa_size XXL.)
Step 2: add the variation to one product#
On a single product, the flow is:
- Open the product, go to the Attributes tab, and tick XXL in the Size attribute’s value list. Save attributes.
- Go to the Variations tab and either add a variation manually and pick XXL, or press Generate variations.
- Fill in the price, SKU and stock for the new row.
- Save.
Worth knowing about step two, because a lot of people avoid it out of fear: Generate variations on an existing product creates the missing combinations and leaves the existing ones alone. It does not wipe your variations and rebuild them. Your prices, SKUs and stock survive.
That said, on a product with several axes it will generate every missing combination, which may be more than you wanted. Check the count before you save.
There is also a ceiling on it. Generate variations creates at most fifty rows per click — the constant is WC_MAX_LINKED_VARIATIONS and fifty is its default. WooCommerce names the per-run maximum in the confirmation dialog before it runs and reports how many it added afterwards, so the limit is announced rather than hidden. The way it bites is the reader who clicks through the dialog without reading it, banks fifty of the ninety-six rows a three-axis product needs, sees no error, and moves on to the next of eighty. Press the button again until the number it reports stops rising, and check the variation count against the total you expected before you call the product done.
If you do this often enough to resent the clicking, raise it in wp-config.php, above the line that tells you to stop editing:
define( 'WC_MAX_LINKED_VARIATIONS', 200 );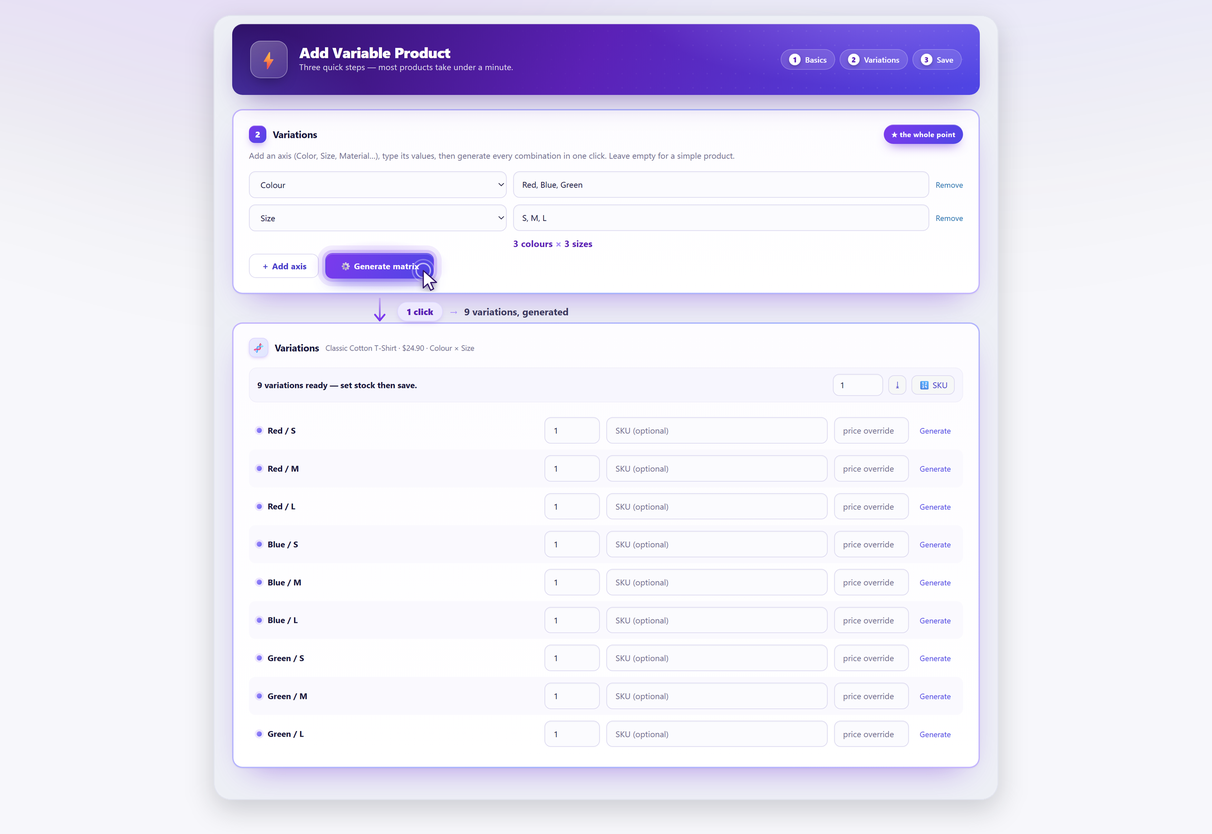
Step 3: doing it across many products#
Eighty products is where manual stops being reasonable. The options, honestly:
| Approach | Good for | Watch out for |
|---|---|---|
| Manual, product by product | Under about ten products | Consistency drift as you get tired |
| CSV export, edit, re-import | Big changes, and the free route that scales — worked through below | Re-importing columns you didn’t mean to change — this is how stock levels get overwritten |
| A bulk variation tool — Smart Manager, WP Sheet Editor | Extending one attribute value across a filtered set | Whether it can preview and undo |
Whichever you use, the important capability is not speed — it’s selection and reversibility. Applying a change to the right eighty products is the hard part, and being able to undo it when the filter turns out to have caught ninety is what separates a routine job from a bad evening.
The free route: WooCommerce’s own CSV importer#
WooCommerce ships a Product CSV Importer and Exporter. Nothing to install, and it will do this job properly — provided you start it in the right order.
Export first, and edit that file. Go to Products → All Products → Export, limit it to the category you’re changing, and download the result. Do not start from a blank spreadsheet. The export hands you the exact column names your site uses, and — this is the part that matters — the current attribute value list for every parent, which is what makes the trap below impossible to fall into.
A new variation is one row. The columns it needs:
| Column | Value |
|---|---|
Type | variation |
Parent | id:123, or the parent product’s SKU |
SKU | The new variation’s own code |
Published | 1 |
In stock? | 1 |
Stock | The quantity, if this variation is to manage its own |
Regular price | The price. Leave it blank and you have built the fault described further down this page |
Attribute 1 name | Size |
Attribute 1 value(s) | XXL |
Then the thing that decides whether this is a ten-minute job or a morning spent restoring a backup: attribute value columns replace, they do not append. The parent row — the one with Type set to variable — has to carry the whole list in Attribute 1 value(s), separated by commas:
S, M, L, XXLNot just XXL. Put the new value there on its own and you strip S, M and L off every product in the file, orphaning the variations that used them. That is the whole reason to export first: the list is already correct in the file, so you are appending one value to it rather than retyping four from memory.
On the import screen, tick Update existing products, and include only the columns you intend to change plus ID or SKU to match on. A column that isn’t in the file is left alone; a column that is in the file and blank is not. That distinction is the entire “re-importing columns you didn’t mean to change” warning in the table above — it is how stock levels get overwritten with nothing.
Run the file on one product before you run it on eighty. The importer does not care how many rows you hand it, which is exactly the problem.
The tool route#
This is the operation that “bulk variations” ambiguously refers to in its third and hardest sense. In Quick Variable Products, extending an attribute across existing products is part of the Pro catalog workspace, with a dry-run preview and an undo — the free plugin covers creating new products, which is a genuinely different job.
The five ways this goes wrong#
1. The new variations have no price#
By far the most common. A generated variation with an empty price field is silently unpurchasable, and it presents worse than simply being absent. The size still appears in the dropdown — that list is built from the attribute values carried by the product’s existing variations, and the new one does exist, it just has no price. Select it and WooCommerce answers “Sorry, no products matched your selection. Please choose a different combination.” with no price and no Add to Cart button. Nothing in the admin warns you. Multiply by eighty products and you’ve quietly created eighty broken options.
That precise shape is why customers report it as “the size doesn’t work” rather than “the size is missing”, and it’s what lets you recognise the fault from an email. If they start saying it, this is almost always why.
Finding it across a catalogue afterwards is the harder half, because the failure is silent by design. The first check is still the front end on three products. The whole-catalogue sweep — for when a bulk run has already happened and you want to know what it left behind — is one read-only query. It changes nothing; it only counts. Run it through wp db query or phpMyAdmin, adjusting the wp_ prefix to match your install:
SELECT p.ID, p.post_parent
FROM wp_posts p
LEFT JOIN wp_postmeta m
  ON m.post_id = p.ID AND m.meta_key = '_price'
WHERE p.post_type = 'product_variation'
  AND p.post_status = 'publish'
  AND (m.meta_value IS NULL OR m.meta_value = '');
Every row it returns is a variation a customer can see and cannot buy. post_parent is the product to go and fix.
2. The new variations have no stock management#
New variations don’t inherit the stock settings of their siblings. A freshly generated row has Manage stock? unticked — which doesn’t mean it has no stock control, it means it falls back to the parent. So there are two outcomes here rather than one, and only the first is obvious.
If the parent isn’t managing stock either, XXL shows as available forever and you’ll take orders for it indefinitely regardless of what’s on the shelf. If the parent is managing stock, XXL quietly draws on the parent’s pool alongside siblings that hold their own counts, and your numbers stop adding up in a way that’s much harder to notice. That second one is the failure to watch for on a product that manages stock per variation everywhere else — checking that the parent has Manage stock ticked is not the all-clear it looks like.
3. The new variations have no image#
A generated variation has no image of its own. So when a shopper picks XXL, the photo doesn’t change — WooCommerce falls back to the parent’s featured image and leaves it there.
On one product nobody notices. Across eighty, on a catalogue where every other variation swaps its photo correctly, customers read it as the site being broken rather than as a field somebody didn’t fill in. It’s also the one of these five that nobody thinks to check after a bulk run, because the page doesn’t look broken — it just shows the wrong thing.
4. SKU collisions and gaps#
Either the new variations have no SKU at all — which breaks scanning and counting — or an auto-generated one collides with something that already exists. WooCommerce will refuse to save on a duplicate, which is helpful, but it means a bulk operation can fail partway through.
If you have a SKU scheme, this is the moment it pays for itself: the new codes are predictable by construction.
5. Products that shouldn’t have got it#
Not everything comes in XXL. A filter that catches “all products with a Size attribute” will happily add XXL to the children’s range. This is the error that’s hardest to spot afterwards, because nothing is broken — you’re just listing things you can’t sell.
A safe order of operations#
- Write down which products should get it — by category, by supplier, by brand. If you can’t express the rule, you’re not ready to run it in bulk.
- Add the term to the global attribute. One place, once.
- Do five products by hand first. Not as a test of the tool — as a test of your rule. Look at them on the front end. Can you buy the new size? Does the price show? Does the photo change when you pick it?
- Preview the bulk run. If your tool can’t tell you what it’s about to touch, do it in batches small enough to check.
- Run it, then check the front end again on three products you didn’t check before.
- Fill in the data — price, stock, SKU, image — before anyone can find the new variations. An unpriced variation still appears in the dropdown and answers “no products matched your selection” when a customer picks it; a priced one with no stock control oversells.
Afterwards#
Two things people forget once the technical part is done:
- Count the new stock. You’ve just created eighty stock records with numbers you typed rather than counted. A partial stocktake scoped to the affected products turns guesses into figures, and it’s much cheaper now than after a month of trading on them.
- Print the labels and tell your supplier. The new SKUs exist in WooCommerce and nowhere else until you do.
The alternative worth considering#
Sometimes the right answer is not to extend the attribute at all.
If the new value only applies to a handful of products, adding it to a shared global attribute makes it available everywhere, and someone will eventually tick it on a product that shouldn’t have it. There’s a pricing consequence as well: if the new size sits at a different price point — and XXL usually does — it widens the price range on the shop page for every product that gets it, so a listing that read £20 – £25 starts reading £20 – £40. And if you’re adding a fourth axis rather than a value to an existing one, stop and count the resulting combinations first — the multiplication gets away from people quickly.
Extending a catalogue is one of the few operations where doing it slowly is genuinely faster.
Adding variations FAQ#
How do I add a new size to a WooCommerce product that already has variations?
Three tabs and a button. The value has to exist on the attribute before the product can use it, so start at Products → Attributes → Configure terms for a global attribute. Then tick it on the product’s Attributes tab, save attributes, and press Generate variations on the Variations tab. The job is not finished until the new row has a price, a stock figure, a SKU and an image — a variation missing any of those fails quietly rather than loudly.
Will Generate variations delete my existing variations?
No. On a product that already has variations, generating creates the missing combinations and leaves the existing ones untouched, with their prices, SKUs and stock intact. On a product with several axes it will create every missing combination though, so check the resulting count before saving.
How do I add the same variation to many products at once?
Either WooCommerce’s own Product CSV Importer, which is free and worked through column by column in the CSV section above, or a bulk variation tool. If you take the CSV route, the one thing to get right is that attribute value columns replace rather than append: the parent row must carry the whole comma-separated list, S, M, L, XXL, not just the new value. Whichever route you take, the capability that matters is not speed but selection and reversibility — being able to see exactly which products a change will touch, and to undo it when the filter turns out to have caught more than you meant.
Why can nobody buy the variations I just added?
Almost certainly because they have no price. The size still shows in the dropdown, but selecting it returns “Sorry, no products matched your selection” with no price and no Add to Cart button, and nothing in the admin warns you. New variations also do not inherit stock settings or images from their siblings, so check those too.
What if some products should not get the new value?
Write the rule down before you run anything — by category, supplier or brand. A filter that catches every product with a Size attribute will happily add XXL to the children’s range, and that error is hard to spot afterwards because nothing looks broken; you are simply listing things you cannot sell.
What should I do after adding variations across a catalogue?
Set price, stock, SKU and image before customers can find them, check the front end on products you did not check during the run, print any new labels, and count the new stock. You have just created stock records with numbers you typed rather than counted.